Blog · 2018-07-29 · Updated 2026-10-01
Create your own WooCommerce shop page or archives with Elementor Pro
Custom shop layouts are a Theme Builder job in Elementor Pro. You design a Products Archive template once, then assign it to the WooCommerce shop page (and optionally to category archives).
You need Elementor Pro plus WooCommerce active. Screenshots below are from Elementor 4.3 / Pro on a test site with sample products.
1. Open Theme Builder
In the WordPress admin, go to Elementor → Theme Builder. Under site parts you will see WooCommerce types: Single Product and Products Archive.
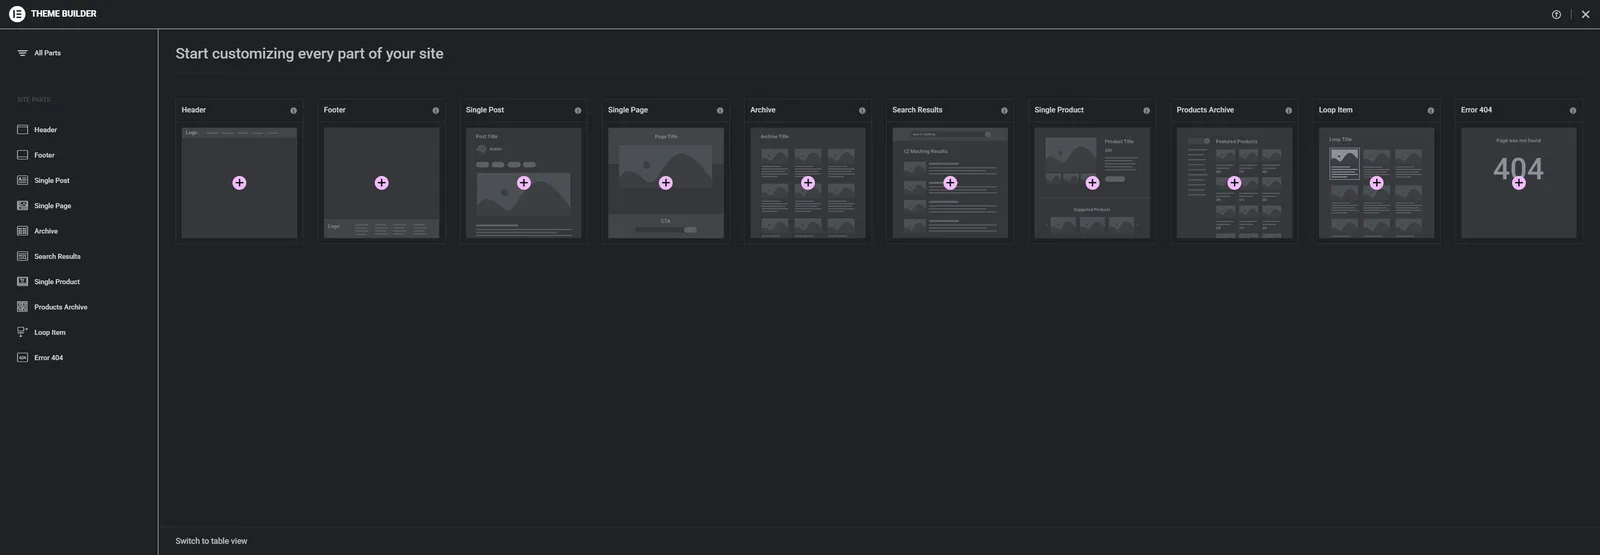
Click Add New on Products Archive (or the pink + on that card). Elementor creates a draft Products Archive template and opens the editor.
2. Library starter (optional)
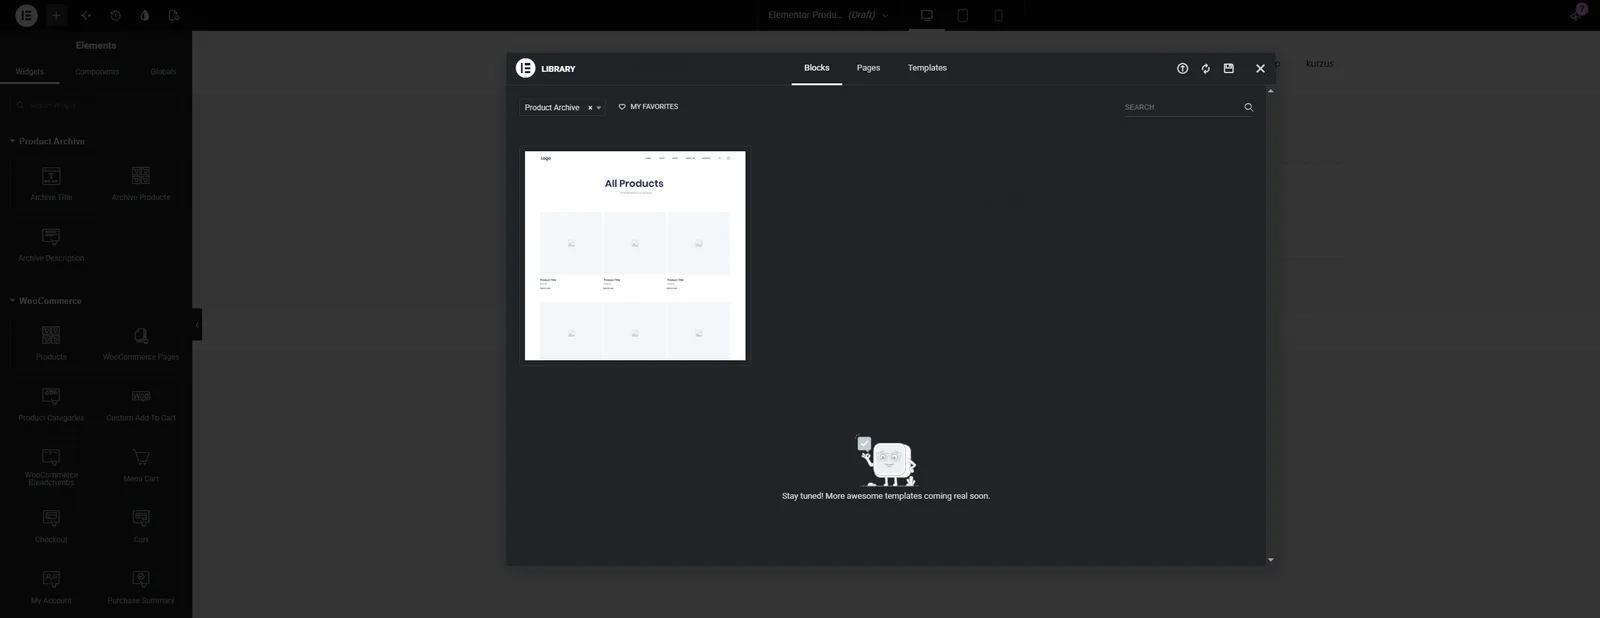
The template library often opens filtered to Product Archive. You can insert a ready block, or close the modal and build from widgets — both work. For this walkthrough we build from widgets so the panel labels match every step.
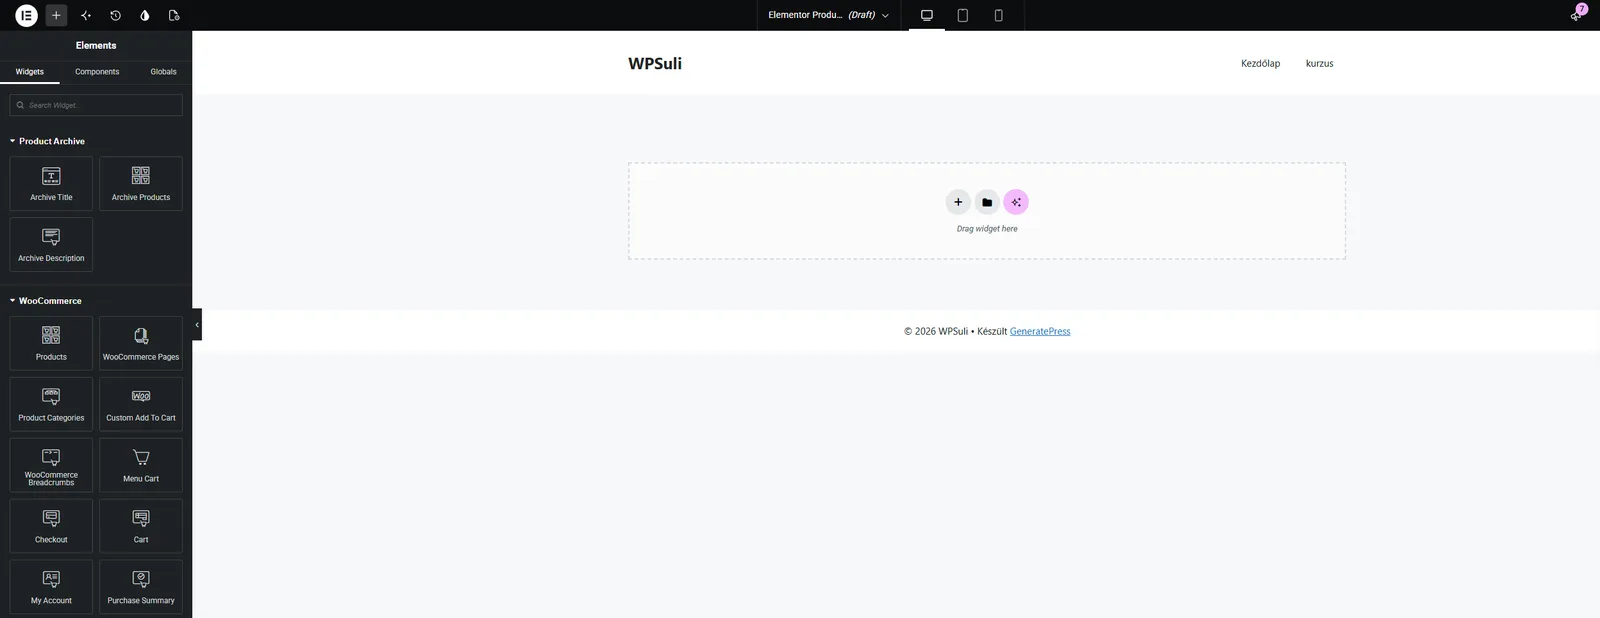
3. Product Archive and WooCommerce widgets
Close the library. In the Elements panel you get a Product Archive group (Archive Title, Archive Products, Archive Description) plus the wider WooCommerce group — including the Products widget for custom queries (sale, featured, and so on).
4. “Latest offers” with the Products widget
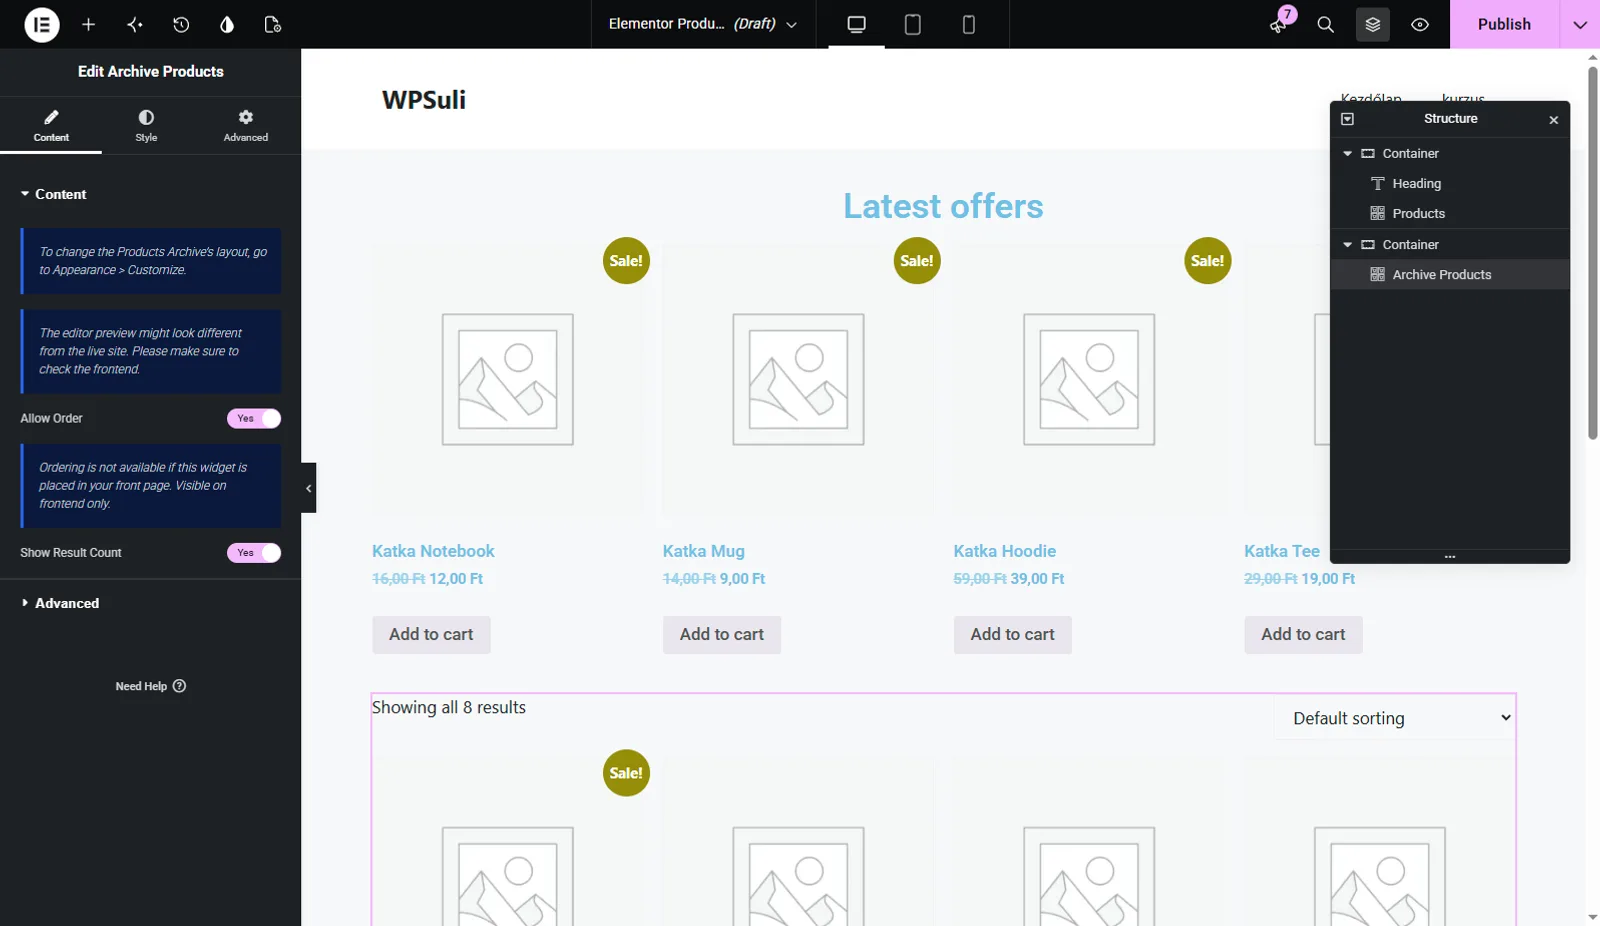
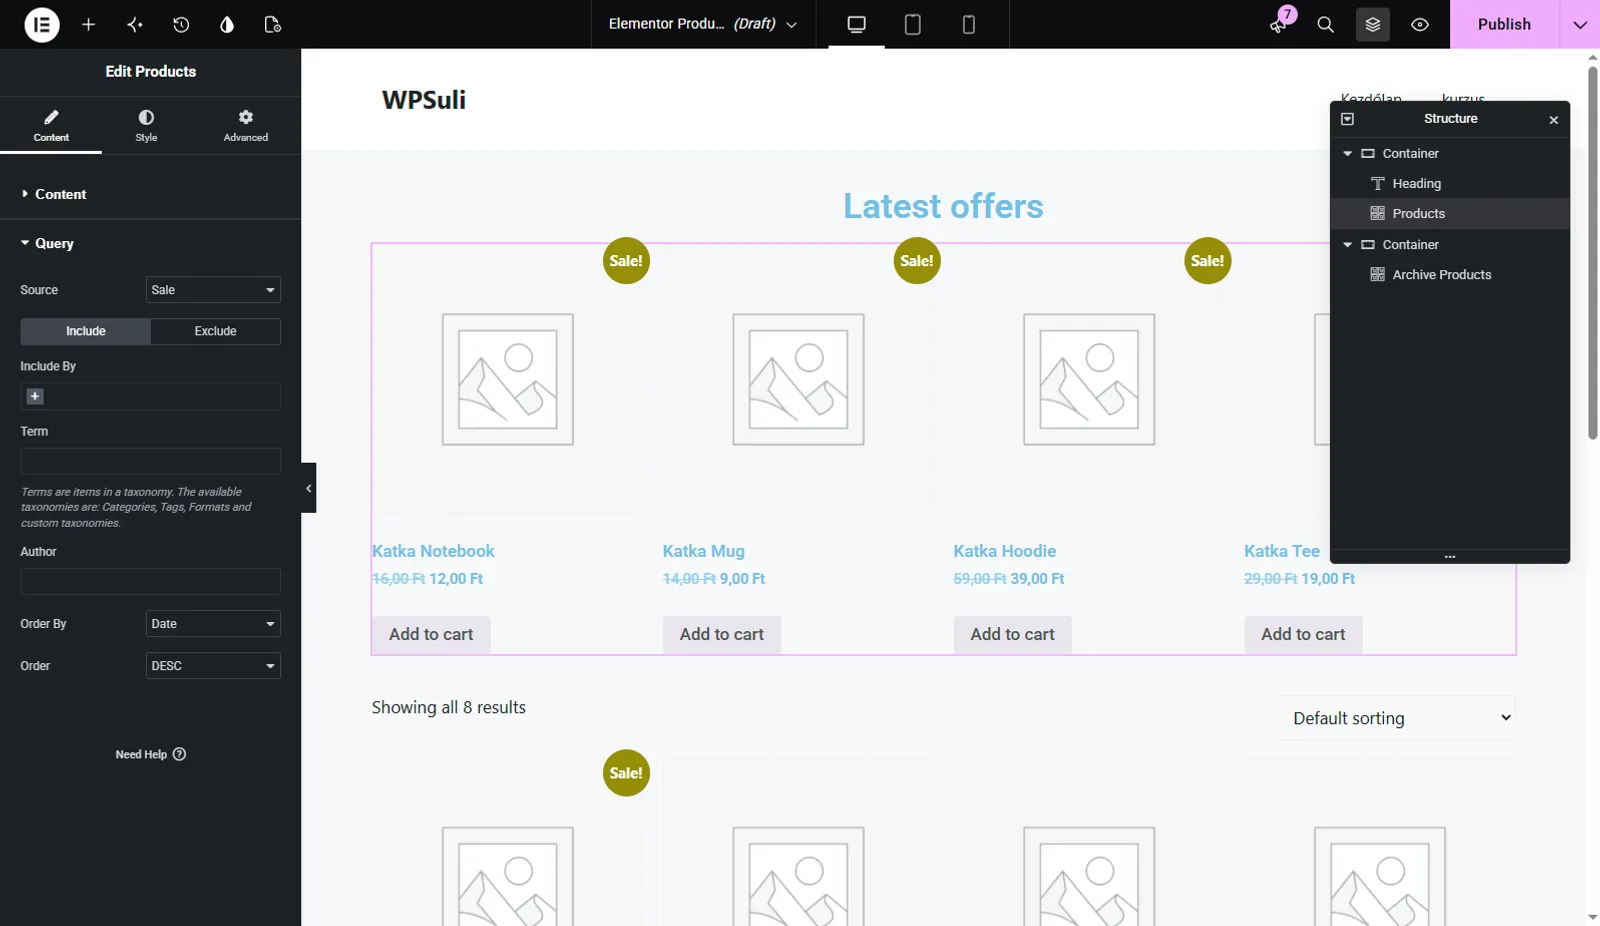
Add a container, a heading (for example Latest offers), and a Products widget. Under Content, set a short grid — here 4 columns, 1 row, pagination No.
Open the Query section. Set Source to Sale (and optionally Order By to Popularity). Style prices, badges, and buttons under the Style tab if you want.
5. Full catalogue with Archive Products
Add a second container and drop in Archive Products. This widget follows the current WooCommerce query — shop page, category, or tag — so it is the right choice for the main catalogue.
Turn on Allow Order and Show Result Count if you want the sorting dropdown and “Showing X results” line. Pagination and column count for the archive layout can also be influenced by Appearance → Customize (Elementor notes this in the panel).
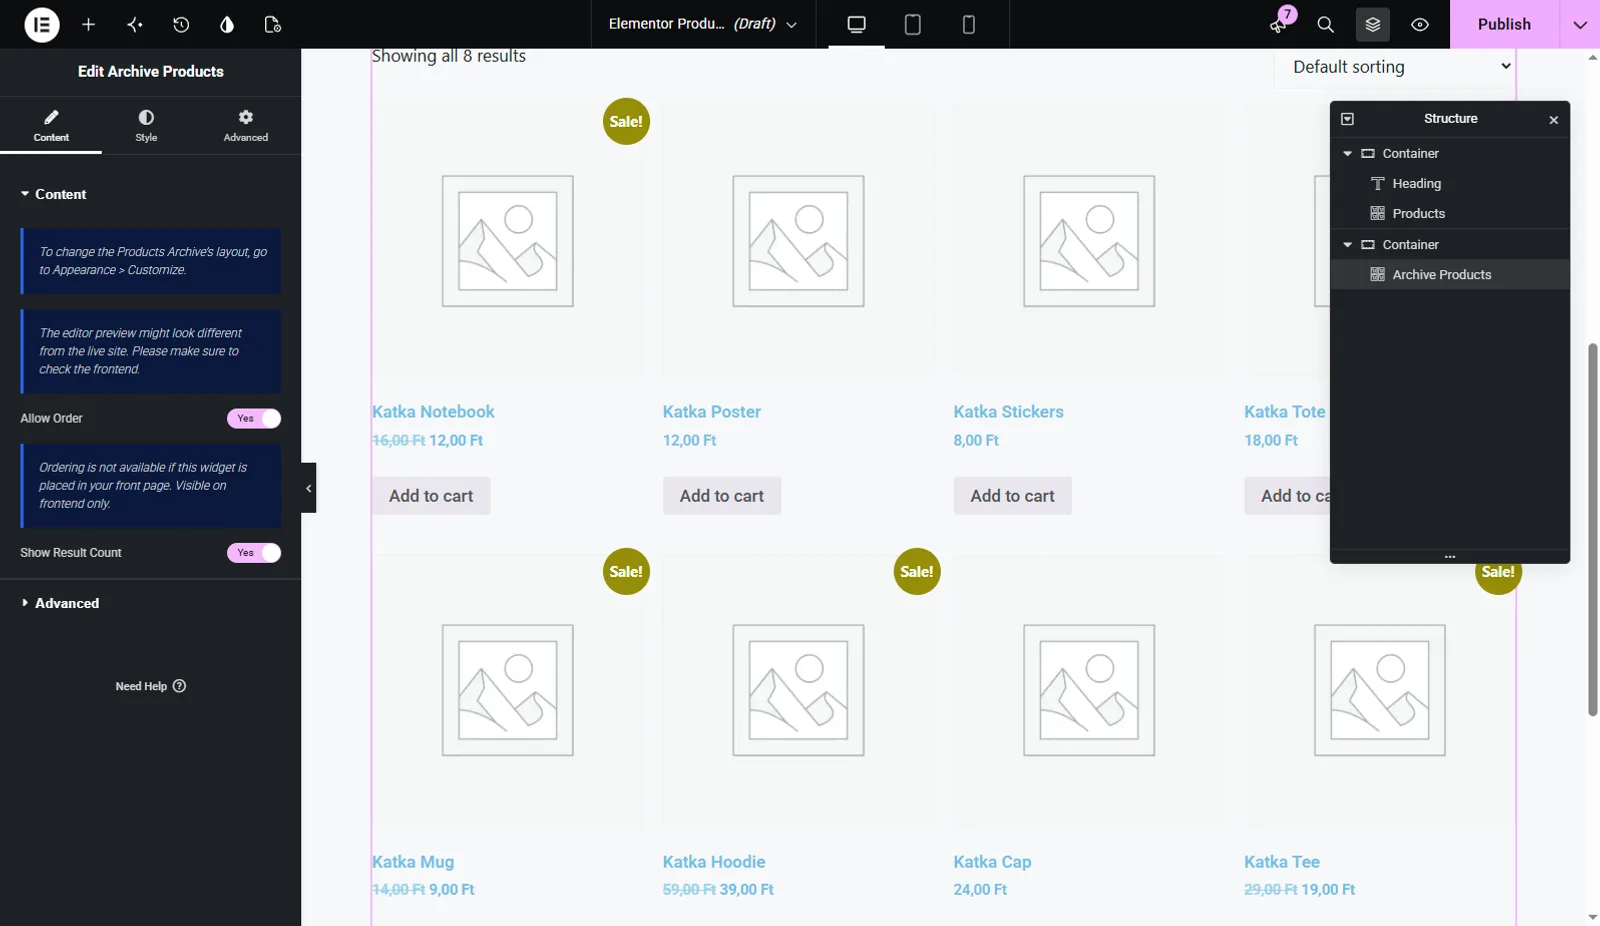
Tip from the old workflow still holds: duplicate the sales section if you want matching styles, then swap the widget (or query) for the catalogue block instead of restyling from scratch.
6. Publish and set display conditions
Click Publish. In Publish Settings, add a condition. For a shop-only layout choose Include → Shop Page. For every shop + category + tag view, use All Product Archives instead (or add separate conditions per category).
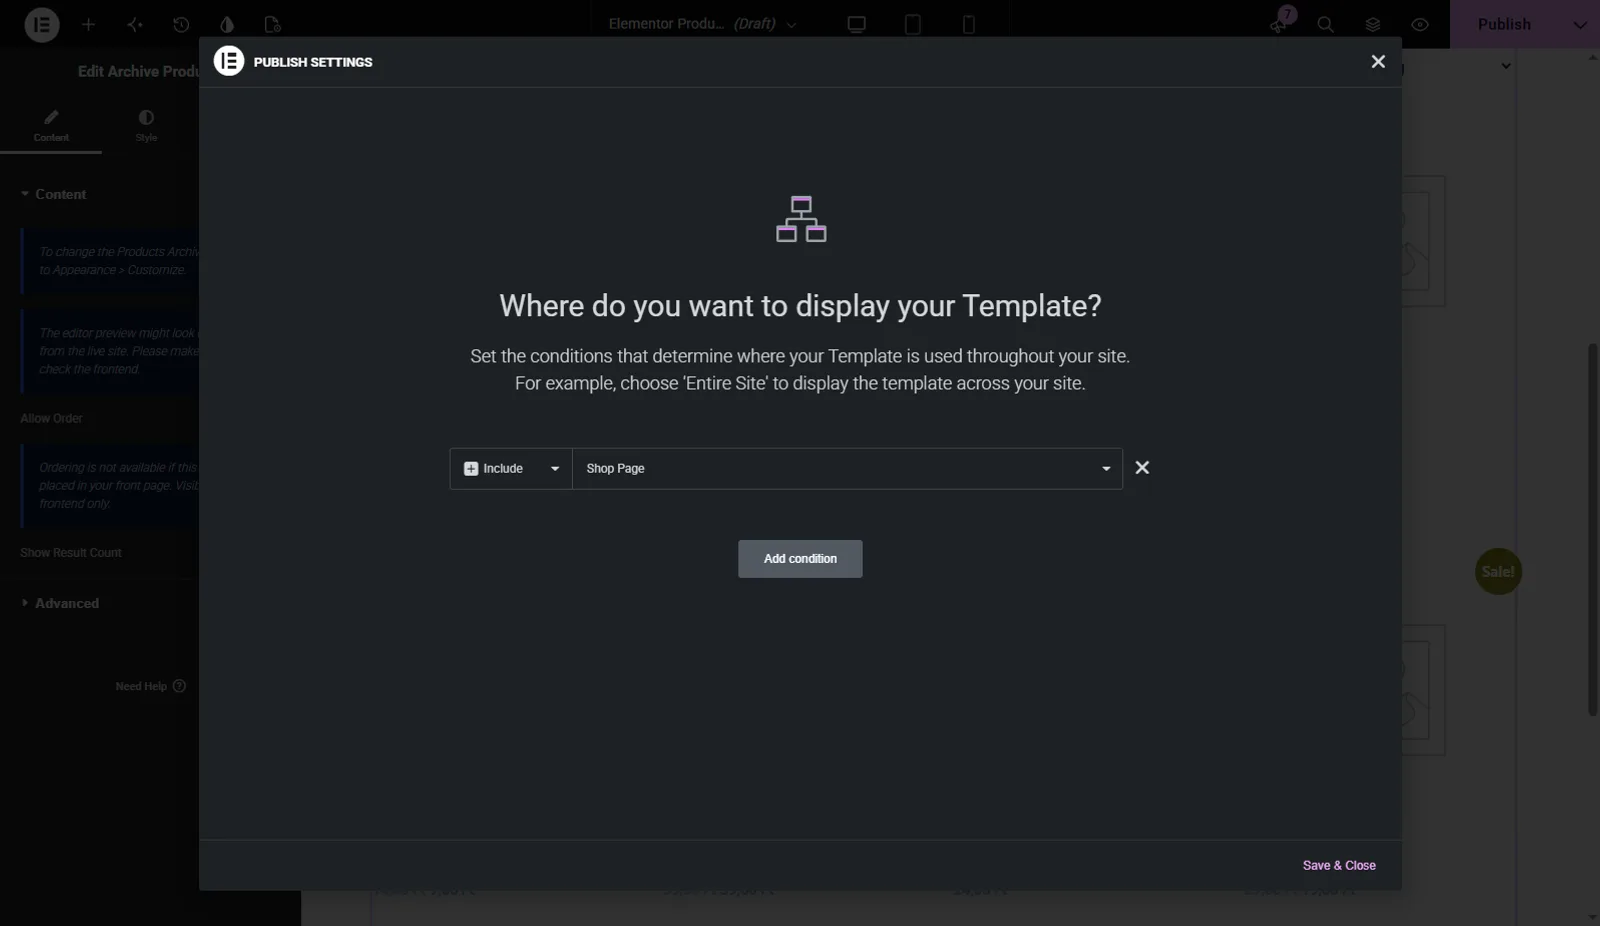
Save & Close. Visit the WooCommerce shop page on the front end to confirm. To theme category archives differently, create another Products Archive template (without the sales strip if you like) and condition it on the categories you want.
Building a full storefront? Pair this with Katka page kits and popups, or grab the pack from pricing.